
ccr_1016_config
This is an old revision of the document!
Table of Contents
~~TOC~~
Cloud core router 1016-12 - Configuration
Prerequisites
- Power up your CCR. Connect to the 192.168.88.1 address via HTTP.
- Upgrade software to latest release. Click Files, then upload the upgrade package. Wait for complete upload, then reboot the unit via System → Reboot.
- Upgrade the Routerboard firmware. System → Routerboard → Upgrade, then reboot the device again. Then check if current firmware is at the same level of the upgrade firmware.
- Disable Quick Set in web interface. Design Skin → deselect Quick Set. → Save → Design Skin.
- Set system identity (hostname):
/system identity set name=your_host_name
Authentication / Security
- Create a new user and add 'Allowed Addresses':
/user add address=1.2.3.4.0/24,9.9.9.0/29 comment="Full Name" group=full name=your_username
- Log in with new user, and disable the default admin user:
/user disable admin
- Create self signed certificate for HTTPS:
/certificate add name=ca-template common-name=CA key-usage=key-cert-sign
add name=server-template common-name=server
/certificate sign ca-template name=CA
/certificate sign ca=CA server-template name=server
/certificate set CA trusted=yes
/certificate set server trusted=yes
/ip service set www-ssl certificate=server
- Disable services, enable SSH / HTTPS:
/ip service disable telnet,ftp,www,api,api-ssl,winbox
/ip service enable ssh,www-ssl
- Disable default MAC telnet server:
/tool mac-server disable numbers=0
/tool mac-server mac-winbox disable numbers=0
- Disable Neighbour discovery:
/ip neighbor discovery settings set default=no
/ip neighbor discovery set numbers=0,1,2,3,4,5,6,7,8,9,10,11 discover=no
LCD / LED
- Change LCD PIN:
/lcd pin set pin-number=1111
- Disable Touchscreen:
/lcd set touch-screen=disabled
- Select Read Only Mode:
/lcd set read-only-mode=yes
- Set default screen:
/lcd set default-screen=informative-slideshow
- Set user LED to flash access:
/system leds set 0 type=flash-access leds=user-led
Initial networking
Default gateway
- Set a default gateway:
/ip route add gateway=1.2.3.4
DNS
- Configure DNS:
/ip dns set servers=1.2.3.4,5.6.7.8
Time/date
- Set manual time zone:
/system clock set time-zone-name=Europe/Amsterdam
- Configure SNTP client:
/system ntp client set enabled=yes server-dns-names=ntp1.polaire.nl,ntp2.polaire.nl
- After a few minutes the time will be set, check:
/system ntp client print
/system clock print
- To be sure, disable time sync via cloud service:
/ip cloud set update-time=no
Firewall input / output chain
These are just basic rules to control access to services and disable outgoing connections.
Input chain
Allow new connections on port 22 and 443 and already established connections.
- Configure input chain:
/ip firewall filter add chain=input action=drop connection-state=invalid comment="Drop invalid"
/ip firewall filter add chain=input action=accept connection-state=established comment="Accept established"
/ip firewall filter add chain=input action=accept connection-state=related comment="Accept related"
/ip firewall filter add chain=input action=accept protocol=tcp src-address=1.2.3.0/24 dst-address=1.2.3.1 in-interface=ether1 dst-port=443 comment="Accept HTTPS access from management LAN"
/ip firewall filter add chain=input action=log dst-address-type=!broadcast,multicast comment="Log denied, skip logging multicast and broadcast"
/ip firewall filter add chain=input action=drop comment="Drop all"
Output chain
Per default i'm not allowing any outgoing connection, for example automatic downloading of packages, phone home, etc. Exceptions are DNS lookup, NTP time sync.
- Configure output chain:
/ip firewall address-list add list=DNS address=1.2.3.4/32
/ip firewall address-list add list=DNS address=1.2.3.5/32
/ip firewall address-list add list=NTP address=1.2.3.6/32
/ip firewall address-list add list=NTP address=1.2.3.7/32
/ip firewall filter add chain=output action=drop connection-state=invalid comment="Drop invalid"
/ip firewall filter add chain=output action=accept connection-state=established comment="Accept established"
/ip firewall filter add chain=output action=accept connection-state=related comment="Accept related"
/ip firewall filter add chain=output action=accept protocol=udp dst-address-list=DNS dst-port=53 comment="Accept DNS lookups"
/ip firewall filter add chain=output action=accept protocol=udp dst-address-list=NTP dst-port=123 comment="Accept NTP sync"
/ip firewall filter add chain=output action=log comment="Log denied"
/ip firewall filter add chain=output action=drop comment="Drop all"
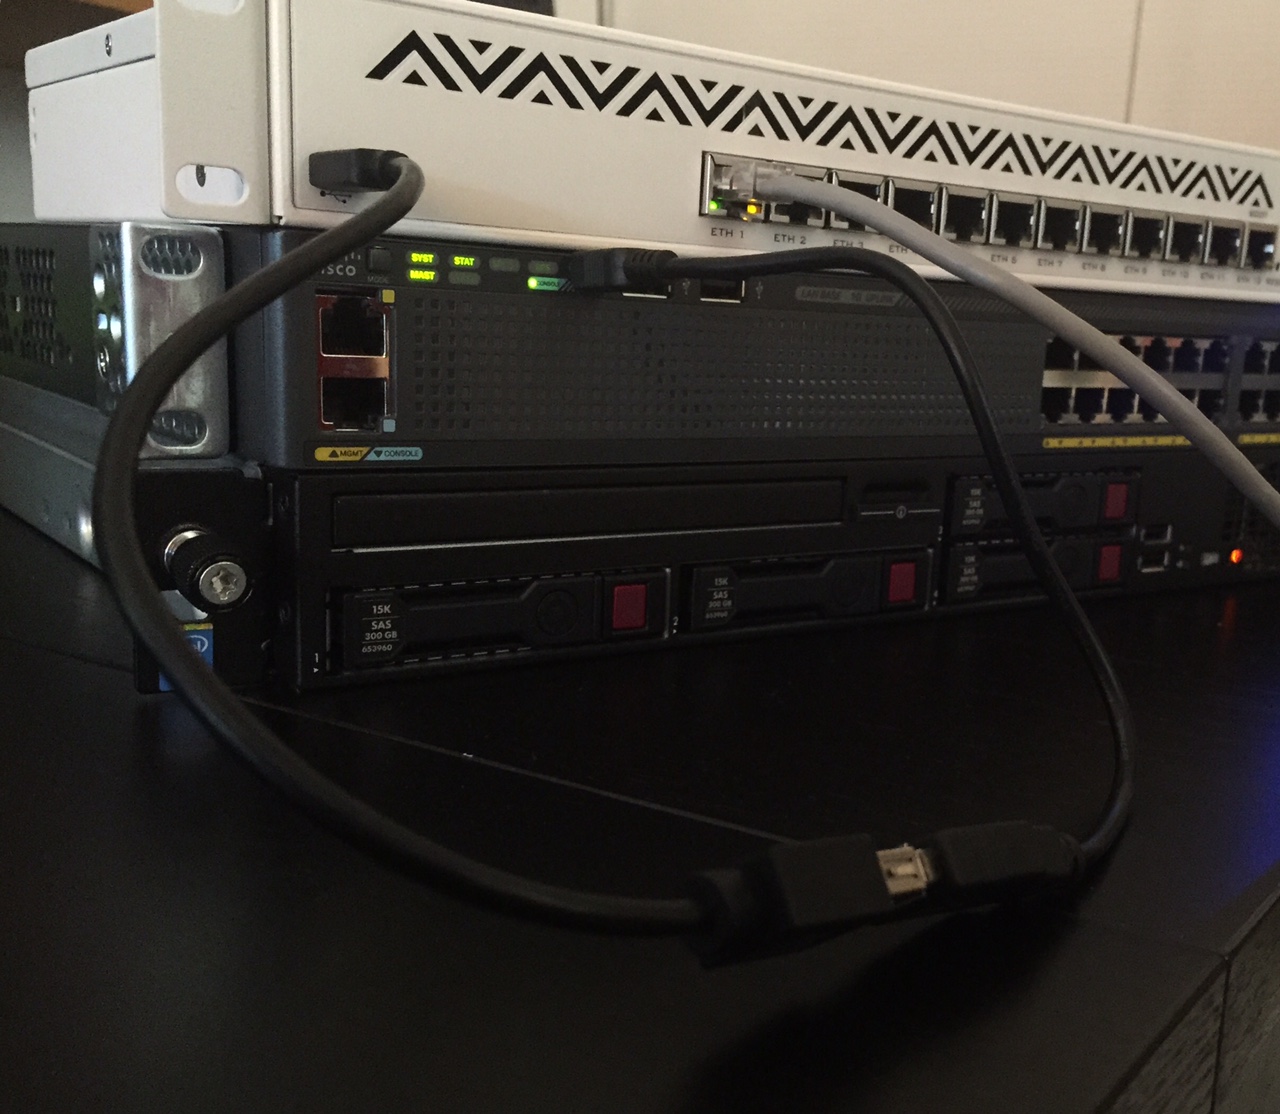
Use USB serial port to connect to other devices (switch)
- Connect a USB↔Serial device, and connect the other end to your switch. In case of Cisco switches, for example the 2960-X you can connect a USB cable directly between the CCR and the Cisco! See picture.
- Configure the port:
/port set usb3 baud-rate=9600 data-bits=8 parity=none stop-bits=1
- Connect to the device (Ctrl-a to quit):
/system serial-terminal usb3
- If connection does not happen, power cycle usb first:
/system routerboard usb power-reset

ccr_1016_config.1427479523.txt.gz · Last modified: 2015/03/27 18:05 by admin