
This is an old revision of the document!
Table of Contents
~~TOC~~
Cloud core router 1016-12 - Configuration
Prerequisites
- Power up your CCR. Connect to the 192.168.88.1 address via HTTP.
- Upgrade software to latest release. Click Files, then upload the upgrade package. Wait for complete upload, then reboot the unit via System → Reboot.
- Upgrade the Routerboard firmware. System → Routerboard → Upgrade, then reboot the device again. Then check if current firmware is at the same level of the upgrade firmware.
- Disable Quick Set in web interface. Design Skin → deselect Quick Set. → Save → Design Skin.
- Set system identity (hostname):
/system identity set name=your_host_name
Authentication / Security
- Create a new user and add 'Allowed Addresses':
/user add address=1.2.3.4.0/24,9.9.9.0/29 comment="Full Name" group=full name=your_username
- Log in with new user, and disable the default admin user:
/user disable admin
- Create self signed certificate for HTTPS:
/certificate add name=ca-template common-name=CA key-usage=key-cert-sign
/certificate add name=server-template common-name=server
/certificate sign ca-template name=CA
/certificate sign ca=CA server-template name=server
/certificate set CA trusted=yes
/certificate set server trusted=yes
/ip service set www-ssl certificate=server
- Disable services, enable SSH / HTTPS:
/ip service disable telnet,ftp,www,api,api-ssl,winbox
/ip service enable ssh,www-ssl
- Disable default MAC telnet server:
/tool mac-server disable numbers=0
/tool mac-server mac-winbox disable numbers=0
- Disable Neighbour discovery:
/ip neighbor discovery settings set default=no
/ip neighbor discovery set numbers=0,1,2,3,4,5,6,7,8,9,10,11 discover=no
LCD / LED
- Change LCD PIN:
/lcd pin set pin-number=1111
- Disable Touchscreen:
/lcd set touch-screen=disabled
- Select Read Only Mode:
/lcd set read-only-mode=yes
- Set default screen:
/lcd set default-screen=informative-slideshow
- Set user LED to flash access:
/system leds set 0 type=flash-access leds=user-led
Initial networking
Default gateway
- Set a default gateway:
/ip route add gateway=1.2.3.4
DNS
- Configure DNS:
/ip dns set servers=1.2.3.4,5.6.7.8
Time/date
- Set manual time zone:
/system clock set time-zone-name=Europe/Amsterdam
- Configure SNTP client:
/system ntp client set enabled=yes server-dns-names=ntp1.polaire.nl,ntp2.polaire.nl
- After a few minutes the time will be set, check:
/system ntp client print
/system clock print
- To be sure, disable time sync via cloud service:
/ip cloud set update-time=no
Firewall input / output chain
These are just basic rules to control access to services and disable outgoing connections.
Input chain
Allow new connections on port 22 and 443 and already established connections.
- Configure input chain:
/ip firewall filter add chain=input action=drop connection-state=invalid comment="Drop invalid"
/ip firewall filter add chain=input action=accept connection-state=established comment="Accept established"
/ip firewall filter add chain=input action=accept connection-state=related comment="Accept related"
/ip firewall filter add chain=input action=accept protocol=tcp src-address=1.2.3.0/24 dst-address=1.2.3.1 in-interface=ether1 dst-port=443 comment="Accept HTTPS access from management LAN"
/ip firewall filter add chain=input action=log dst-address-type=!broadcast,multicast comment="Log denied, skip logging multicast and broadcast"
/ip firewall filter add chain=input action=drop comment="Drop all"
Output chain
Per default i'm not allowing any outgoing connection, for example automatic downloading of packages, phone home, etc. Exceptions are DNS lookup, NTP time sync.
- Configure output chain:
/ip firewall address-list add list=DNS address=1.2.3.4/32
/ip firewall address-list add list=DNS address=1.2.3.5/32
/ip firewall address-list add list=NTP address=1.2.3.6/32
/ip firewall address-list add list=NTP address=1.2.3.7/32
/ip firewall filter add chain=output action=drop connection-state=invalid comment="Drop invalid"
/ip firewall filter add chain=output action=accept connection-state=established comment="Accept established"
/ip firewall filter add chain=output action=accept connection-state=related comment="Accept related"
/ip firewall filter add chain=output action=accept protocol=udp dst-address-list=DNS dst-port=53 comment="Accept DNS lookups"
/ip firewall filter add chain=output action=accept protocol=udp dst-address-list=NTP dst-port=123 comment="Accept NTP sync"
/ip firewall filter add chain=output action=log comment="Log denied"
/ip firewall filter add chain=output action=drop comment="Drop all"
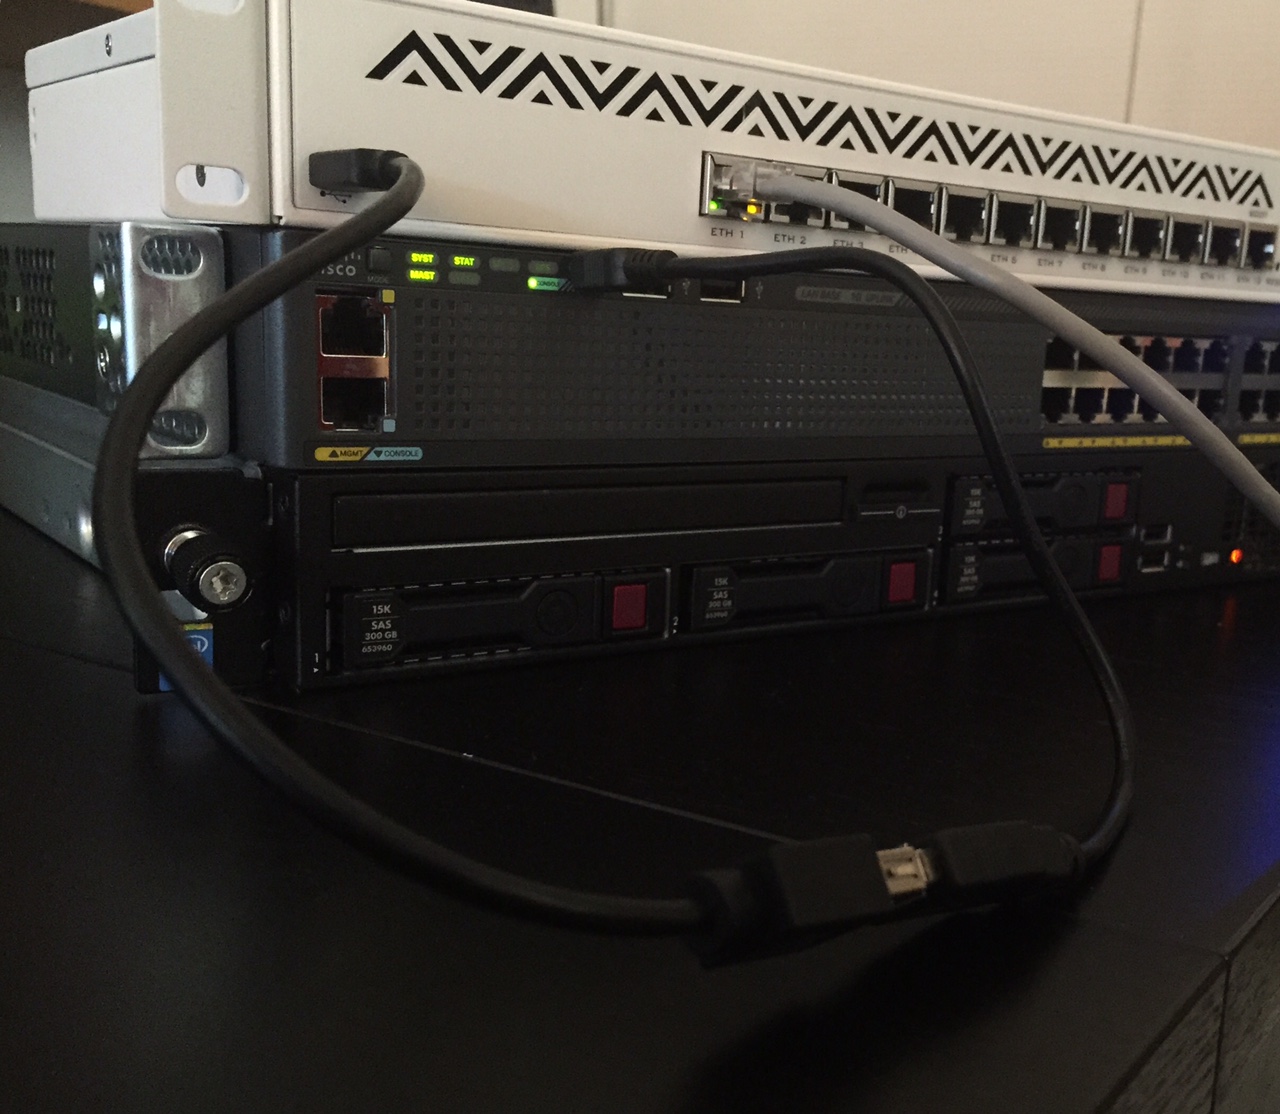
Use USB serial port to connect to other devices (switch)
- Connect a USB↔Serial device, and connect the other end to your switch. In case of Cisco switches, for example the 2960-X you can connect a USB cable directly between the CCR and the Cisco! See picture.
- Configure the port:
/port set usb3 baud-rate=9600 data-bits=8 parity=none stop-bits=1
- Connect to the device (Ctrl-a to quit):
/system serial-terminal usb3
- If connection does not happen, power cycle usb first:
/system routerboard usb power-reset

Source validation
Current recommended practice in RFC3704 is to enable strict mode to prevent IP spoofing from DDos attacks. If using asymmetric routing or other complicated routing, then loose mode is recommended.
strict - Strict mode as defined in RFC3704 Strict Reverse Path. Each incoming packet is tested against the FIB and if the interface is not the best reverse path the packet check will fail. By default failed packets are discarded.
- set rp_filter to strict:
/ip settings set rp-filter=strict